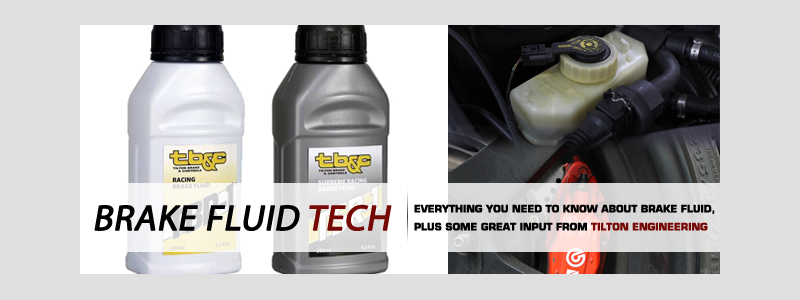
Brake Fluid: Stay Safe And Go Fast
 The following article originally appeared on Turnology.com and features an interview with Tilton’s President, Jason Wahl.
Brake fluid does not get the love it deserves. It isn’t as glorified as engine oil and its change intervals are often overlooked—or in the worst case, flat out ignored. There are far too many people who purchase cars, take them to the track, but don’t change the brake fluid for years. Think for a moment about what is on the line when that middle pedal fails to function. Yeah, there’s quite a bit on the line. With that being said, we bring you some valuable information on brake fluid to keep you safe, on the road and the track.
Understanding the types of brake fluid on the market, their change intervals and what situations can contaminate or degrade them is paramount to a successful brake setup.
Below is some great input from Jason Wahl, President and CEO of Tilton Engineering. There is a lot to learn, so follow along as we walk you through all you need to know about brake fluid!
What’s the Difference?
A walk down the parts store fluid isle can be overwhelming for inexperienced gearheads. There are a plethora of brake fluid options lining the shelves and a palpable pressure to choose the correct bottle. Let’s dive a little into the chemistry of those mystery bottles to figure out which is the right choice.
There are two main types of brake fluids, which include petroleum-based (mineral oil) and non-petroleum based options. Petroleum-based fluids are rarely used in the automotive industry, while non-petroleum-based fluids are the norm.
The FMVSS-116 brake fluid specification is based on non-petroleum fluids and is a universally accepted brake fluid specification. The most common fluids you will find, DOT 3, 4, and 5.1, are all mixtures of glycols and glycol ethers—DOT 5 however, is a silicone-based fluid not used in modern automobiles.
Before we go any further into the different fluid classifications, it’s helpful to understand the most tell-tale characteristics of the stuff: boiling point.
Brakes are subjected to a lot of heat on a daily basis. On and off the track, each fluid must have a labeled boiling point to classify what applications it should be used for.
 To complicate that a bit, every brake fluid has two boiling points, one wet and one dry. The dry boiling point refers to the temperature at which the fluid boils before it absorbs moisture, while the wet boiling point refers to the temperature that the fluid starts to boil after it has absorbed said moisture. Absorbs moisture? Yes, regardless of how tightly you screw the cap onto your brake fluid reservoir, some amount of water will eventually seep in.
The reason for that has to do with brake fluid’s hygroscopic nature. Hygroscopy is the ability of a substance to attract and hold water molecules from the surrounding environment. Glycol-ether brake fluids such as DOT 3, 4, and 5.1 are all very hygroscopic. In other words, the fluids attract water; and, as we know, water has a boiling point of 212 degrees Fahrenheit—in the world of brakes, that is not very high. That low boiling point averages with the brake fluid around bringing down the boiling point of the whole system (wet boiling point).
When the brake fluid becomes saturated with water (3.7 percent by volume), that water can boil in the lines and produce steam (the gaseous form of water). Unlike a liquid, a gas is highly compressible. To some this up, when a compressible substance (steam) is introduced into a hydraulic system (the brakes), that system can no longer function and the pedal will likely go to the floor –not good! Replacing the fluid before it becomes saturated with water (which we will touch on later) is the key to maintaining the dry boiling point.
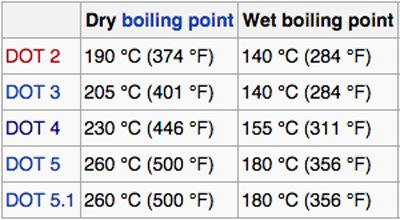
Now that we’ve gotten the boiling point out of the way, it’s time to talk about individual brake fluids. DOT 3 is first on the list and it is a poly glycol-based fluid. The minimum dry boiling point for DOT 3 fluid is 401-degrees Fahrenheit and it has a minimum wet boiling point of 284-degrees Fahrenheit. It has a tendency to absorb 1- to 2-percent of water in one year based on operating conditions and temperatures. DOT 3 brake fluid can be mixed with DOT 4 or 5.1 without damaging the system.
DOT 4 is also a poly glycol-based fluid and is used in medium to larger modern-day cars and trucks. With a dry boiling point of 446-degrees Fahrenheit and wet boiling point of 311-degrees Fahrenheit, DOT 4 brake fluid is used in vehicles that are subject to high altitude, towing, or have ABS. High-speed braking is also in the DOT 4 category and that just happens to be optimal for racetrack conditions. This fluid can also be mixed with DOT 3 and 5.1 without damaging the system. DOT 4 contains more alcohol and has a higher initial boiling point than DOT 3 but absorbs moisture quicker and must be replaced more often.
Choosing the Right Brake Fluid
When preparing for a track day it’s important to have the right brake fluid, as the brakes will be used and abused throughout the day. Racing brake fluid might be more expensive, but it’s definitely worth it.
Brake fluid such as a Super DOT 4, for example, has a higher boiling point than a conventional DOT 4 and also can absorb more moisture before its boiling point begins to drop. Even when the fluid has become contaminated with a greater percentage of water content, it will continue to maintain its wet boiling point performance and not degrade further. Racing brake fluid and other more expensive fluids are also packaged with nitrogen, not oxygen, and that’s because nitrogen has a lower moisture content compared to oxygen.
“Racing brake fluids tend to use a different chemical composition (typically borate esters) to achieve higher boiling points and less compressibility,” explained Wahl. “These fluids are more expensive to create and typically cost more, which is why you don’t find them in the local auto parts store.”
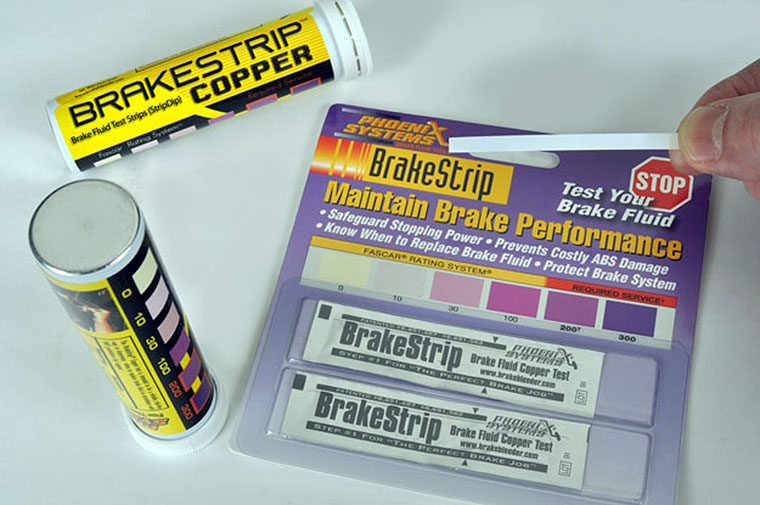
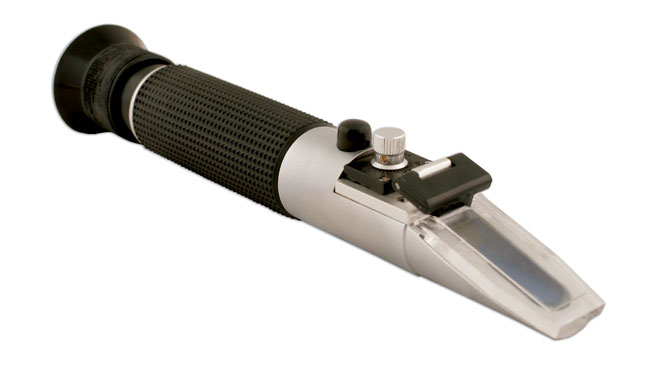
Contamination and How to Test Brake Fluid
We now know that most commonly used brake fluids are hygroscopic and absorb moisture, lowering the boiling point over time and potentially causing a “spongy” pedal. However, a spongy pedal can also be an effect of contamination.
Contamination can occur whether the car is driven in excess of 20,000 miles a year or just sits in the garage. Brake fluid contamination is a product of time and humidity as well as hard driving, not how many miles the car is driven. To avoid fluid contamination, simply change the fluid at least once a year and don’t open the reservoir cap unnecessarily.
It wouldn’t be accurate to check brake fluid by looking at its color. The color is added into the fluid to easily detect leakage and is not an immediate determinate of its condition. Some fluid darkens quickly even though it’s still healthy.

Changing Intervals and Flushing Techniques
As far as change intervals go, it’s best to replace brake fluid at least once a year. If the car is driven hard at the track and the fluid is constantly heated up, you’ll want to replace the fluid more often, based on the testing methods explained earlier.
Conservative drivers who track their car more than six weekends a year tend to flush and bleed their systems before every event, but it’s good to stay a step ahead of the game and change (or at least test) the brake fluid after every track outing.
In addition to the aforementioned brake fade, water-contaminated fluid can also cause corrosion of brake-system components. “For sure a full flush and fill at the beginning of each season,” said Wahl. “Depending on your car, climate, and track, you might want to do it again mid-season.”
Flushing and bleeding the brakes are two different procedures, but at the same time, they’re pretty similar. Bleeding the brakes entails circulating fluid to remove air from the brake lines, while flushing is intended to remove contaminants and/or old fluid from the lines.
Bleeding the brakes is not a difficult task. However, let us be clear: If you have any doubts as to your ability, seek professional assistance.
There are tools available such as manual vacuum pumps that let you bleed the system from the caliper without having to depress the pedal or waste fluid. There are also pressurized bleeder tools that can be used with an air hose or pumped manually. The sequence to bleed the brakes, as well as flush them, is to start with the caliper that is furthest away from the master cylinder, but all manufacturers have their own ways, so it would be best to check in the owner’s manual of the specific vehicle being worked on.
Flushing of the brake system can easily be done with two people, one in the car pumping the brakes and the other person at the caliper to release the pressure. Or, to speed up the process, with specified brake tools mentioned earlier. A good way to ensure a complete flush is to get a different color brake fluid than what’s already in the car and cycle the new fluid through until you see a consistent fluid color and no more bubbles.
“Completely draining the system and refilling with fresh fluid will result in the best performance,” Wahl explained. “One could also simply bleed the system thoroughly while continuing to add fresh fluid, but any old fluid left in the system will be the weak link in the chain from a fluid boiling standpoint.”
Conclusion
Brake fluid should not be neglected. Without good brake fluid, our brakes won’t work as they should, and our safety—not to mention our lap times—will suffer.
At track days, the brake system is one of the main parts of the car to pay attention to. If the fluid is either incorrect or contaminated, the brakes can become useless, causing a big problem for you and the racers around you. We can’t stress enough that if you’re going to take your car out to the track, check your brake fluid. And heck, check the rest of the car while you’re at it!
 P65 Notice